Backup and Restoring the Registry on Windows 11 is another Important Topic. Registry Editor is a file that stores the database of settings. This file holds the data of software, hardware, etc. You can open the Registry Editor on Windows 11 By Clicking the window start button and searching it.
Error or Incorrect Changing in the Registry file can cause many troubles. So, if you want to make changes in the Windows Registry, it’s best to create a backup and restore the settings if anything goes wrong.
Backup and Restore the Registry on Windows 11
There are two methods for Backup and Restoring the Registry on Windows 11. In this article, we will guide you step by Step. Here are these two methods ;
1) Backup Registry via System Restore
2) Backup & Restore Registry via Registry Editor
These two methods are followed in detail.
1) Backup Registry via System Restore
The restoring point is a backup utility that backs up all Windows files and settings to a different location on the Computer. If you want to back up the registry, the easiest option is to create a system restore point in the Computer.
This way, you will back Windows to the previous state if anything goes wrong while changing the registry file.
There is following are followings steps;
1. First, Click the Windows 11 start button, search Create a restore point, and click the Open button.

2 Second, select your system installation drive in the System Properties.
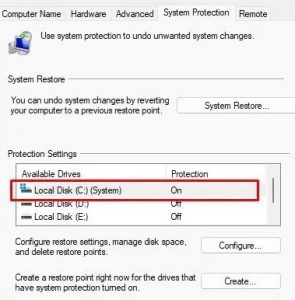
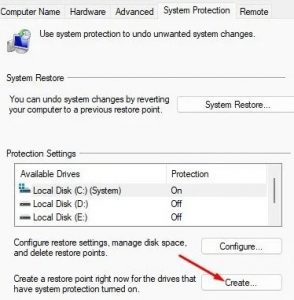
3. Third, Click on the Create button as shown in the below Image.
4. Fourth, you have been asked to type any Description to the Name Restore Point and Then Click Create Button.
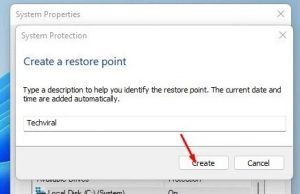
This way, you can create a restore point in the Windows 11 operating system.
Restore the registry from the Backup.
If anything goes wrong in the Registry, You can Restore it to the previous state in Windows 11. Here are the below Articles. Let’s start it.
1. First, Click on Windows 11 Start Button Search. Create a restore point and Open it.

2. On the System Properties, click on the System Restore option and click it.
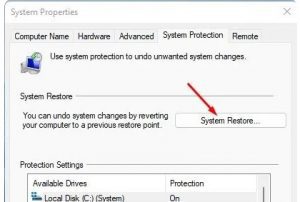
3. Next, click the Next button on the System Restore window.
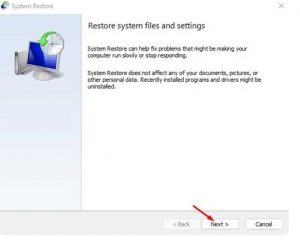
4. In the Fourth Step, select the restore point you have created before and click on the Next button.
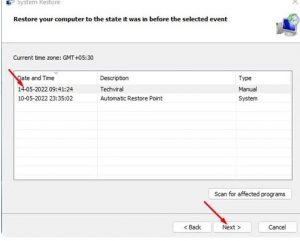
5. In the Final Steps, Click on the Finished button.
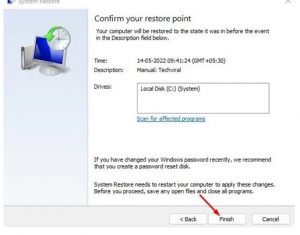
In this way, you can restore the registry from your created backup file.
2) Backup & Restore Registry via Registry Editor
The Registry Editor allows you to back up and restores the Registry file in Windows 11. The Followings steps are to back up and Restore the Registry on Windows 11.
- First, Click the Start Button in Windows 11, Search Registry Editor, and Open it.

2. After Opening the Registry Editor, Click on the File Button and Select Then Export.
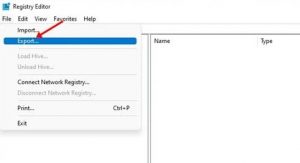
3. select the save location in this Step and click the Save button.
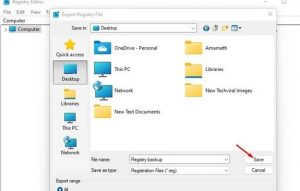
4. In this way, this will back up the Registry settings on your Windows 11.
5. Open the Registry and Select File > Import to restore the Windows Registry.
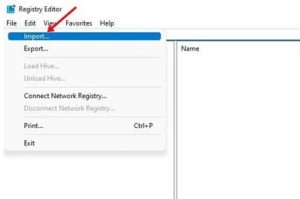
6. In the last Step, Select the Registry backup file you have exported.
In this way, you will know how you can Backup and Restore the Registry on Windows 11
For More Tips and Tricks, Click Here.
