Changing the Default System Font on Windows 11 is another important topic for Windows 11 users. It provides more customization options than Windows 10. It has an attractive user interface, a Start menu, new icons, and a few themes with wallpapers.
The most important customization is that you can Change the Default System Font on Windows 11. To Make Windows 11 look attractive, Change the font Style. In this blog post, I will guide you step by step guide to Change Default System Font on Windows 11.
Steps to Change Default System Font on Windows 11
You must modify the registry settings to Change the Default System Font on Windows 11. It must safely back up the Registry file before following the steps. So, in case of an error in the Registry file, You can use backup to recover the data.
There are three steps to Change the Default System Font on Windows 11.
1. Pick the Font from the Font Menu in Windows 11
2. Change the Default System Font in Windows 11
3. How to Restore Default System Font in Windows 11
Let’s start it.
1. Pick the Font from the Font Menu IN Windows 11
First of all, Select your Favourite Font on Windows 11. Then follow the below steps;
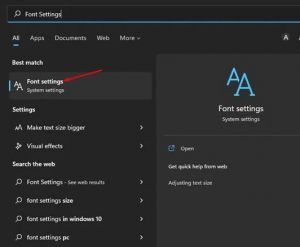
1. First, click the start button and search Font Settings. Click on the Font Settings.
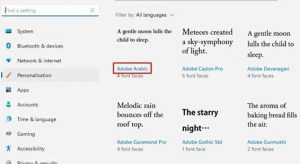
2. Next, Scroll down and find the Font you want to use as default, then click OK.
2. Change the Default System Font in Windows 11
You must create a registry file to change the system font in this Second Method. Here is the Following Step’;
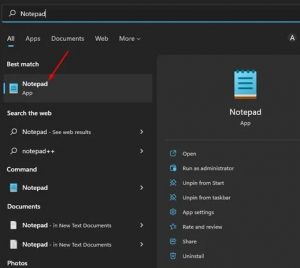
1. First, Open Windows Start Button. Search Notepad, and Open it.
2. In the Notepad, Copy and Paste the Following Code;
Windows Registry Editor Version 5.00
[HKEY_LOCAL_MACHINE\SOFTWARE\Microsoft\Windows NT\CurrentVersion\Fonts]
"Segoe UI (TrueType)"=""
"Segoe UI Bold (TrueType)"=""
"Segoe UI Bold Italic (TrueType)"=""
"Segoe UI Italic (TrueType)"=""
"Segoe UI Light (TrueType)"=""
For example, if you want to use Adobe English as a system font, the code will be like the below one;
Windows Registry Editor Version 5.00
[HKEY_LOCAL_MACHINE\SOFTWARE\Microsoft\Windows NT\CurrentVersion\Fonts]
"Segoe UI (TrueType)"=""
"Segoe UI Bold (TrueType)"=""
"Segoe UI Bold Italic (TrueType)"=""
"Segoe UI Italic (TrueType)"=""
"Segoe UI Light (TrueType)"=""
"Segoe UI Semibold (TrueType)"=""
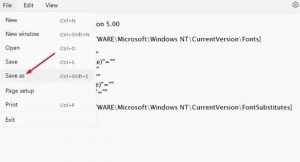
3. click the File Menu and select Save as in the Notepad.
4. Select ‘All files in the Save as type block. Type in a name for the file followed by the .reg extension also. For example – New System font. reg below
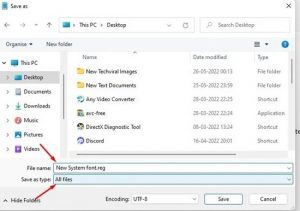
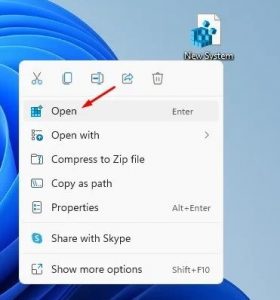
5. Click on the Save button o. Then, right-click on the Registry file that you have created, and select Open.
6. Then, you will see a confirmation dialogue box. Click on the Yes button.
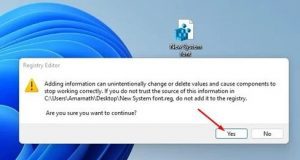
In this way, you can switch the Font on your Window.
3. How to Restore Default System Font on Windows 11
If you want to back your Font, create another registry file in your Windows to Change the Default System Font on Windows 11.
1. open Notepad on your Windows 11 PC and paste the following code.
Windows Registry Editor Version 5.00
[HKEY_LOCAL_MACHINE\SOFTWARE\Microsoft\Windows NT\CurrentVersion\Fonts]
"Segoe UI (TrueType)"="segoeui.ttf"
"Segoe UI Black (TrueType)"="seguibl.ttf"
"Segoe UI Black Italic (TrueType)"="seguibli.ttf"
"Segoe UI Bold (TrueType)"="segoeuib.ttf"
"Segoe UI Bold Italic (TrueType)"="segoeuiz.ttf"
"Segoe UI Emoji (TrueType)"="seguiemj.ttf"
"Segoe UI Historic (TrueType)"="seguihis.ttf"
"Segoe UI Italic (TrueType)"="segoeuii.ttf"
"Segoe UI Light (TrueType)"="segoeuil.ttf"
"Segoe UI Light Italic (TrueType)"="seguili.ttf"
"Segoe UI Semibold (TrueType)"="seguisb.ttf"
"Segoe UI Semibold Italic (TrueType)"="seguisbi.ttf"
"Segoe UI Semilight (TrueType)"="segoeuisl.ttf"
"Segoe UI Semilight Italic (TrueType)"="seguisli.ttf"
"Segoe UI Symbol (TrueType)"="seguisym.ttf"
"Segoe MDL2 Assets (TrueType)"="segmdl2.ttf"
"Segoe Print (TrueType)"="segoepr.ttf"
"Segoe Print Bold (TrueType)"="segoeprb.ttf"
"Segoe Script (TrueType)"="segoesc.ttf"
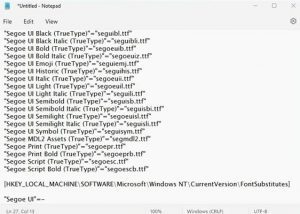
2. Click on Save.
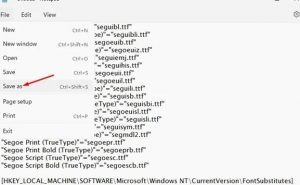
3. In the Third Step, Select’ All files’ on the Save as type. Then, type in a name for the file followed by the .reg extension. For example – Default font. Reg in Notepad.
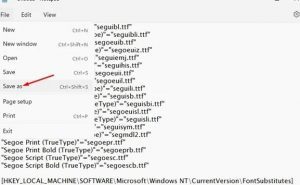
4. Click the Save Button, right-click the Registry file, and select Open.
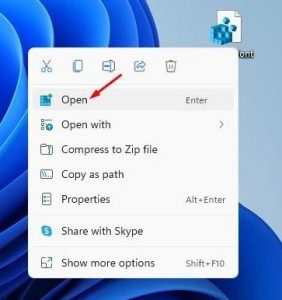
5. Then, Click on the Yes button.

In this way, you will restore the default font on your Windows 11 PC.
These are all about changing Default System Font on Windows 11. If you want More Customization, Use Third-Party App.
For Further Tips and Tricks, Click Here.
